Measuring Range of Motion
This is an excerpt from Examination of Musculoskeletal Injuries 4th Edition With Web Resource by Sandra J Shultz,Peggy A Houglum,David H Perrin.
Examination of Physiologic Range of Motion
Goniometry is the measurement of joint angles. The tool you will use to measure joints is a goniometer. There are many different types of goniometers on the market, but each has essentially the same structure: two arms (one stationary and one moveable) and an axis (fulcrum) that is surrounded by the body of the goniometer, which contains a measuring scale. The scale is usually similar to a protractor and calibrated in degrees. The scale can be either a 360° full-circle or a 180° half-circle. Goniometer arms range in length from 1 in. to 14 in. Use the long-armed goniometers to measure long bone joints such as the knee, and the short-arm goniometers to measure smaller joints such as the toe and finger interphalangeal joints. Goniometers similar to a carpenter level are called gravity-dependent goniometers, or inclinometers, and are used most often to measure motion in the spine (figure 6.2). Tape measures can also be used to identify lumbar range of motion if an inclinometer is not available (figure 6.3). Compare the measures found during the examination with previous measures or compare the left and right sides. Electric goniometers are also available but are usually reserved for research; they are more expensive and impractical for clinical use. Some of the more common goniometers are shown in figure 6.4. Calculate joint range of motion by measuring the angles between the beginning position and the ending position of available motion.
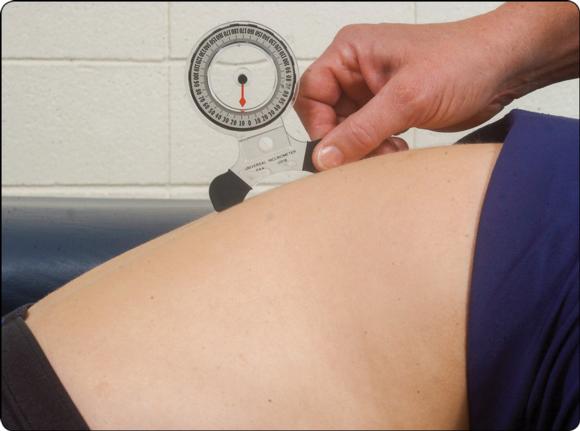
Goniometers similar to a carpenter level are called gravity-dependent goniometers, or inclinometers, and are used most often to measure motion in the spine.
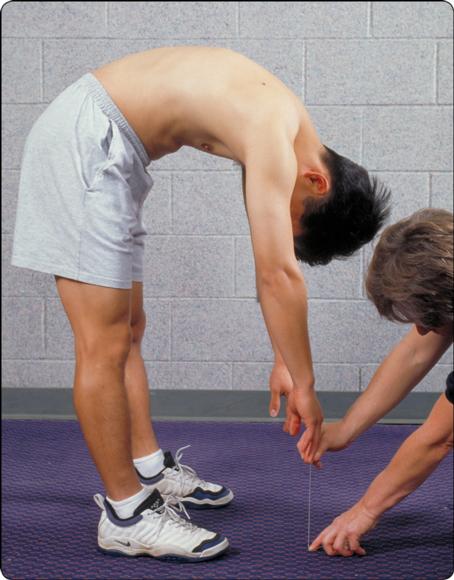
Use of a tape measure to examine ROM of the spine. See chapter 11 for details on measurement technique.
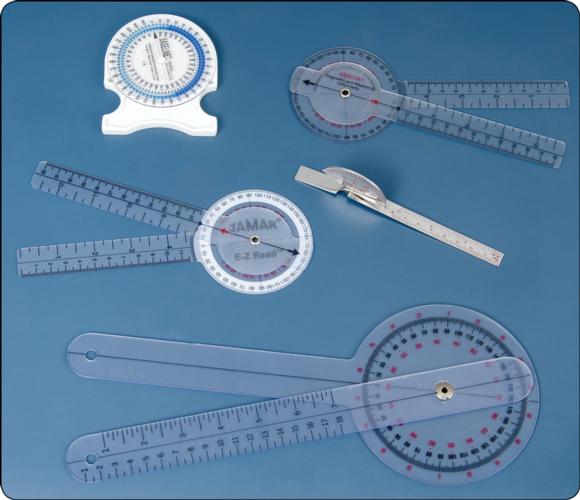
Different types of goniometers used to measure range of motion.
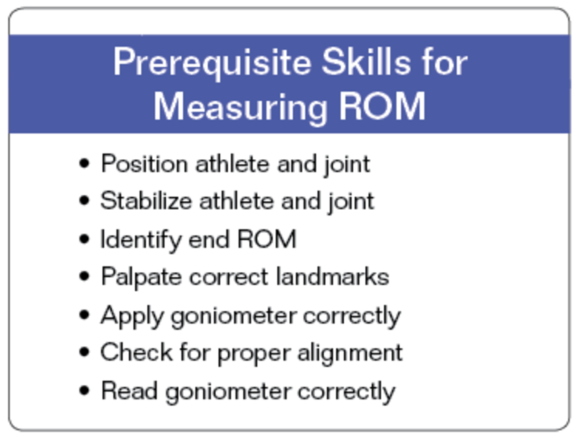
Measuring ROM accurately requires precision, and precision is achieved through practice and skillful observation. In addition to thoroughly mastering the material presented in this chapter, you must be able to position and stabilize the patient and segment to be measured, appropriately determine the end range of motion, identify and palpate the correct landmarks, apply the goniometer in the proper position, and read the goniometer correctly.
Positioning
Position involves four factors: the patient, the joint, the goniometer, and yourself. Incorrectly positioning any of these items can result in an inaccurate measurement of joint motion. You should position the patient so the joint to be measured can move through its ROM freely, without obstruction, and so you can easily observe the joint. The patient should be comfortable. If you need to measure several motions, you should plan the sequence of measurements so you will minimally change the patient's position. For example, you should measure all motions with the patient in prone before moving the patient to another position.
You must also carefully consider the position of the segment to be measured, particularly when measuring active motion. A segment that must lift against gravity may give a false active motion measurement if its muscles are not sufficiently strong enough to lift through the range of motion. When measuring passive ROM, performing too many activities at the same time such as stabilizing the part, holding the extremity against gravity, and aligning the goniometer may lead to a gross error of measurement. You should document the segment's position during ROM testing when recording the measurement.
Positioning the goniometer correctly is crucial; if the arms of the goniometer are not aligned properly, the measure will be inaccurate. Likewise, moving the axis of the goniometer off the joint line will yield an incorrect measurement. The correct technique for goniometer alignment is discussed under Measurement Technique.
Finally, your position is just as important as the other factors in ROM measurements. Once you have placed the goniometer and ensured proper alignment, you must read the goniometer at eye level for an accurate reading. For example, if you measure hip flexion and read the goniometer in an erect standing position, the results could differ by several degrees from the reading you would obtain if you knelt down to read the goniometer at eye level.
Please refer to "Prerequisite Knowledge for Measuring ROM" and "Prerequisite Skills for Measuring ROM" for a summary of the prerequisite skills.
 |
|
Patient Stabilization and Substitution
Stabilization is isolating the motion of the joint while eliminating unwanted motion from adjacent structures. You must stabilize the patient before measuring ROM or examining end feel to assure reliable results. Most often, you will stabilize the proximal joint segment and move the distal segment. You must isolate a joint motion to examine it accurately. If you allow both joint segments to move, true joint end feel may be inaccurate.
Moreover, if you do not stabilize the proximal segment, motion of other joints may contribute additional motion gains, exaggerating the joint's true motion and resulting in substitution. For example, if you measure shoulder flexion without appropriately stabilizing the shoulder, the patient can hyperextend the spine and falsely appear to have greater shoulder motion. Your knowledge of possible substitutions and an awareness of the patient's movement will assist in recognizing substitution patterns. Stabilization during ROM examination ensures a truer execution of the test and a more accurate result.
Occasionally the patient's body weight may prevent unwanted motion. Most motions, however, require manual stabilization of the proximal segment to prevent unwanted motion. You must know how to stabilize the proximal segment while simultaneously using a goniometer to measure joint motion.
Measurement Technique
Goniometric measurement requires proper alignment of the stationary and moveable arms and the goniometer's axis (figure 6.5). Use bony landmarks to properly place these elements. Place the stationary arm along the longitudinal axis of the stabilized joint segment and the moveable arm parallel to the longitudinal axis of the moving joint segment. When using a 180°-scale goniometer, you may need to reverse the stationary and moving arms before the moveable arm will register on the scale. Align the goniometer's axis with the joint's axis of motion. If the goniometer arms are accurately placed, the fulcrum will be positioned correctly.
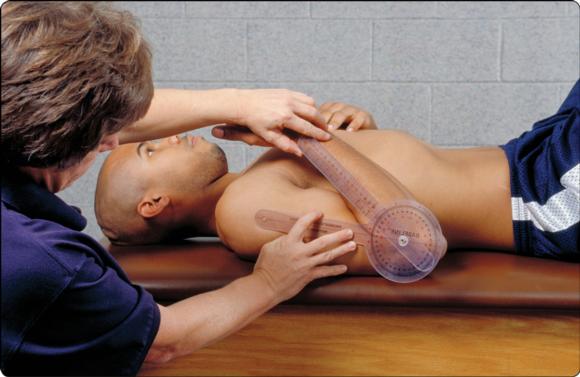
The axis is placed at the joint, the stationary arm is along the longitudinal aspect of the stabilized segment, and the moveable arm is placed in alignment with the moving segment.
Visit the web resource, video 6.2, for the range of motion measurement technique.
To correctly align the goniometer arms, position yourself so your line of vision is at the same level as the goniometer. Checking both arms more than once before reading the scale also assures correct alignment. Often, you will align the stationary arm and then unwittingly move it again when adjusting the moveable arm; even highly experienced clinicians make a habit of checking and rechecking the goniometric arm and axis positions before reading the measurement.
Before measuring range of motion, you should explain to the patient what you will do. Take measurements at the start and end positions of the joint motion. If you are only interested in the end of the ROM, it is assumed that the start position is 0° and has been verified by visual determination. ROM examination is usually performed on the uninvolved extremity before the injured extremity. Performing the examination in this sequence provides you with an idea of what to expect when you examine ROM of the injured segment.
The final factor in ROM measurement is recording the measure. Some facilities use forms listing normal ranges of motion and you can simply fill in the blanks with the patient's measurements. If such a form is not available, you should record the date, the patient's position (seated, prone), the type of motion (active or passive), and the side of the body and joint measured. Note any pain or other abnormal reactions that occur during the examination. If the patient lacks full motion, record the degrees as a range. For example, if a patient lacks 20° of knee extension and has full knee flexion motion, record ROM as 20-145°. If the patient has excessive motion, or hypermobility, use a minus to indicate excessive mobility. For example, if the patient has 15° of hyperextension of the knee and normal flexion motion, record -15-145°.
Avoid using a visual estimate to determine range of motion. The visual estimate may be off and can easily vary among clinicians, and it is not an objective measure. Especially avoid estimating if you use the measurement to identify a deficiency, record progress, or determine a patient's readiness to return to normal activity levels.
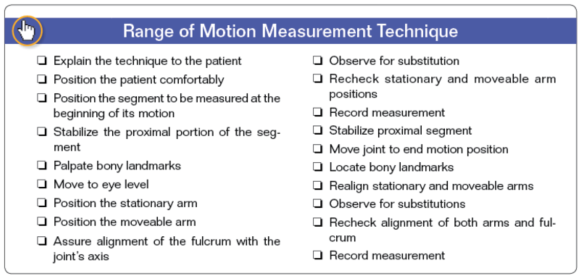
See "Range of Motion Measurement Technique" for a summary.


Get the latest insights with regular newsletters, plus periodic product information and special insider offers.
JOIN NOW
Latest Posts
- What performance obstacles do master athletes face?
- Cannabidiol (CBD) and mycoprotein as supplements
- Weight, body composition, and performance in athletes
- The gut-brain-bone axis and Biodynamic Skeletal Therapy
- Touch-testing in Biodynamic Skeletal Therapy treatment
- The six stages of Biodynamic Skeletal Therapy treatment


