How to work with tight hip flexors
This is an excerpt from Soft Tissue Therapy for the Lower Limb by Jane Johnson.
The hip flexors include the psoas, iliacus, rectus femoris and tensor fasciae latae, all of which may feel tight after prolonged hip flexion or sporting activity. Because the rectus femoris is one of the quadriceps muscles, you would also benefit from reading about how to treat tight quadriceps in chapter 4.
A common belief among therapists is that people with shortened hip flexors will have reduced strength in the gluteal muscles, which could impair sporting performance, for example. However, Calvillo, Escalante and Kolber (2021) did not find this to be the case. Using techniques such as stretching to increase length in the hip flexors may therefore have little impact on gluteal strength, should that be your goal. Nonetheless, the material in this section will be useful for other reasons, such as for treating clients who report discomfort due to tension in their hip flexors or in whom you believe that hip flexor tension may be contributing to anterior pelvic tilt and potentially to low back pain. Reducing tension in the hip flexors may also be helpful in preventing injury: Tight hip flexors have been identified as a significant risk factor for hamstring injury in older adults who play Australian football (Gabbe, Bennell, and Finch 2006).
Trigger Point Release
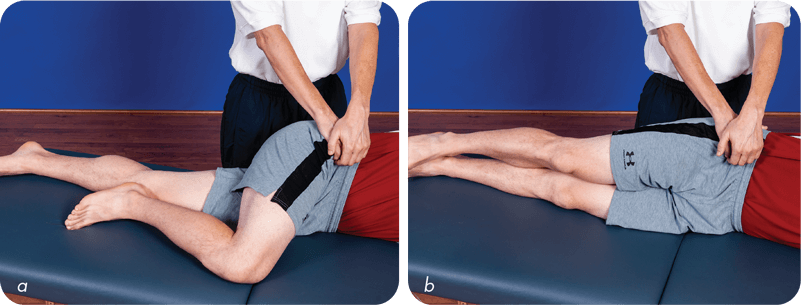
A trigger point in the iliacus is located high in the muscle, just inferior to the iliac crest on the anterior of the ilium (figure 3.17). It sends pain down the upper part of the anterior thigh. Palpate for it with your client in the side-lying position, hooking your fingers gently over the crest and pressing them towards you (figure 3.18a). Prolonged hip flexion aggravates this trigger, which is associated with triggers in the psoas and quadratus lumborum muscles. Ferguson (2014) provides three case studies of clients with idiopathic scoliosis, describing how trigger points in muscles, including the iliacus, affect and are affected by spine shape.
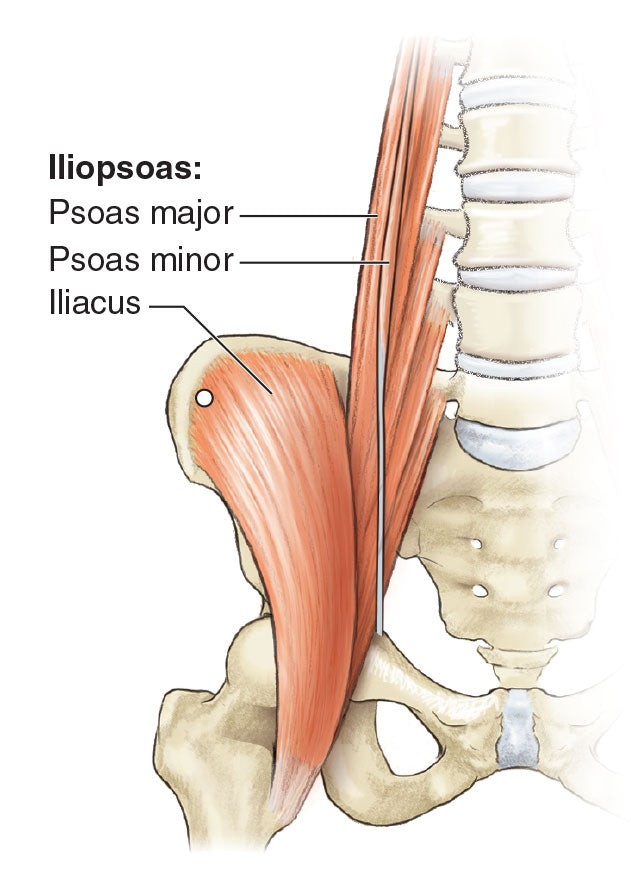
Oh and colleagues (2016) describe how an inflatable ball was used to deactivate triggers in a range of muscles, including the iliacus, in a group of older patients with chronic low back pain. All participants had trigger points in the gluteus maximus, gluteus medius, iliopsoas and quadratus lumborum on at least one side that had persisted for more than 2 months. The iliopsoas was treated actively with the patients in the prone position; the hip on the affected side was abducted to approximately 45 degrees, and the knee was flexed to 90 degrees. Significant improvements were found in pain scores on the Visual Analogue Scale, pressure pain sensitivity and lumbar flexion.
Some clients may find this technique invasive; therefore, show your client where you intend to place your hands, and be sure to obtain the client’s approval before performing this stretch. With your client in the side-lying position with the hip flexed, lock into the iliacus on the anterior surface of the ilium (figure 3.18a). The abdomen falls away in the side-lying position, so having the client in this position rather than supine is relatively safer. Whilst maintaining your lock, ask your client to straighten the leg, which extends the hip (figure 3.18b). The area to be worked is small, so the lock may be repeated in the same place or a centimetre to one side. Usually, performing the stretch three times this way will provide some relief from tension in the hip area.
If the client requires a greater degree of stretch, have them extend their hip at the end of the movement rather than pressing more firmly with your fingers. One way to explain this action is to ask the client to press into your fingers when you get to the end of the movement.
TIP
This area can be ticklish. An alternative approach is to ask the client to place their own hand on the area, and then you press over it. You can also dissipate your pressure by working through a facecloth folded into fourths.
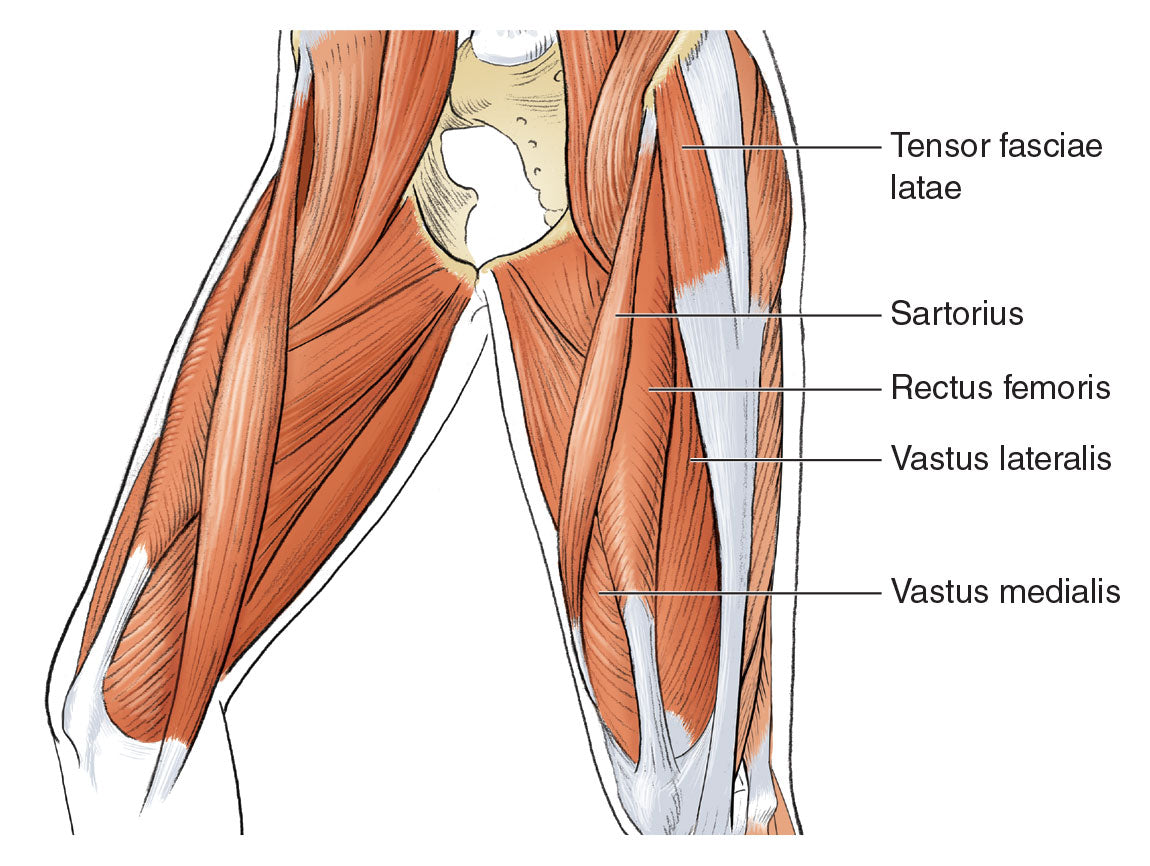
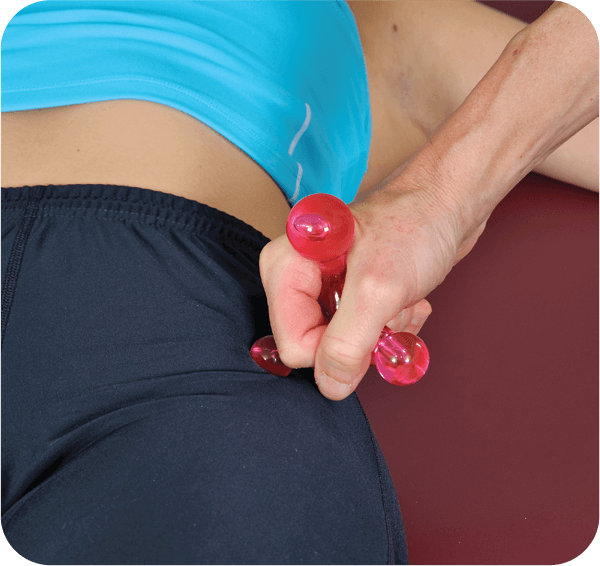
It is always useful to explore whether there are trigger points in the tensor fasciae latae (figure 3.19). Locate this muscle by asking your client to raise their leg off the treatment couch, rotating it internally. Once you find the muscle, position a massage tool gently against it (figure 3.20). Press firmly into the muscle, searching for trigger spots. When you locate one, apply gentle pressure for 60 seconds, allowing the ‘grateful pain’ to dissipate. This is a great technique to save therapists’ thumbs when deep pressure needs to be applied to this small muscle. Using a massage tool safely and effectively takes some practice; take care to avoid pressure to the greater trochanter.
TIP
To identify the tensor fasciae latae, position the client supine and palpate the iliac crest. The muscle originates from the posterior aspect of the crest and will contract if you have the client lift their leg off the treatment couch and rotate the hip internally. (You can try this yourself whilst standing: Flex your hip and internally rotate it, keeping your knee straight.)
Stretching
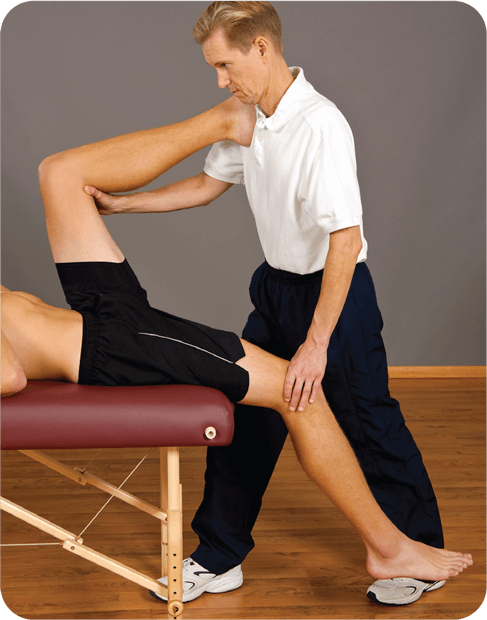
Passive stretches for the hip flexors could be performed in the prone (figure 3.21) or supine (figure 3.22) position. To perform the stretch with the client prone, insert a small towel beneath the knee to take the hip into slight extension. In some clients, this increases lordosis in the lumbar spine and may be uncomfortable. Stretching the rectus femoris muscle in the prone position could be harmful if a client has a history of trauma to the low back, because the lumbar spine extends in this position. One way to reduce lumbar extension is for clients to perform a posterior pelvic tilt whilst you retain the position of the leg; thus, they perform the stretch themselves without your needing to flex the knee farther. This is also a good starting position for using Muscle Energy Technique (MET). An alternative is to place your hand on the pelvis before flexing the knee, preventing movement in the pelvis and spine.
Notice that in figure 3.22, the client needs to be positioned so that they are able to extend the hip (thereby stretching the hip flexors) and not have the thigh supported, as shown in the photograph.

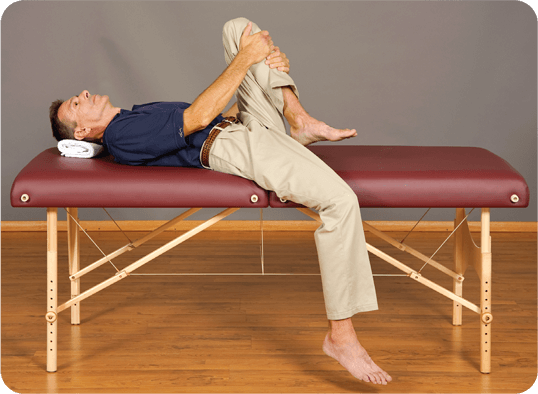
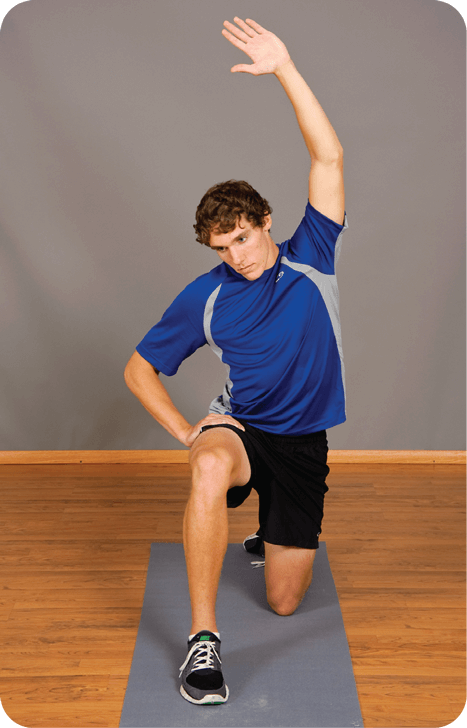
It is important to have a variety of stretches you can demonstrate for clients who have tight hip flexors. For example, figure 3.23 illustrates how to stretch the hip flexors by hanging the affected leg off one side of a bed. Kneeling (figure 3.24) is an alternative for clients who are comfortable on their knees. In both positions, flattening the low back so the pelvis is posteriorly tilted increases the stretch on the hip flexors. An easy way to explain this is to suggest that the client contract the buttock muscles. The stretch shown in figure 3.24 can be further enhanced if the client raises their arm above their head and turns towards the flexed knee of the opposite leg (figure 3.25). In this way, all the fasciae connecting the anterior hip and thigh and the lateral side of the body are tensioned.

Strengthening
Due to reciprocal inhibition, strengthening of the opposing muscle group – in this case, the hip extensor muscles – is likely to be beneficial in reducing tension in the hip flexors. Chapter 7 has more information.
More Excerpts From Soft Tissue Therapy for the Lower LimbSHOP

Get the latest insights with regular newsletters, plus periodic product information and special insider offers.
JOIN NOW


